1. 简介
Spring Cloud Stream 是 一 个用来为微服务应用构建消息驱动能力的框架。 它可以基于Spring Boot 来创建独立的、 可用于生产的 Spring 应用程序。 它通过使用 Spring Integration来连接消息代理中间件以实现消息事件驱动。 Spring Cloud Stream 为 一 些供应商的消息中间件产品提供了个性化的自动化配置实现,并且引入了发布与订阅、 消费组以及分区这三个核心概念。
简单说就是屏蔽各种消息中间件底层差异,简化开发,快速上手
2. 基本使用
2.1 导入pom
1
2
3
4
| <dependency>
<groupId>org.springframework.cloud</groupId>
<artifactId>spring-cloud-starter-stream-rabbit</artifactId>
</dependency>
|
2.2 yaml配置
producer
1
2
3
4
5
6
7
8
9
10
11
12
13
14
15
16
17
18
19
20
21
| spring:
application:
name: StreamProducerService
cloud:
stream:
binders:
defaultRabbit:
type: rabbit
environment:
spring:
rabbitmq:
host: 192.168.56.101
port: 5672
username: root
password: root
virtual-host: /
bindings:
output:
destination: default_stream
content-type: application/json
default-binder: defaultRabbit
|
consumer
1
2
3
4
5
6
7
8
9
10
11
12
13
14
15
16
17
18
19
20
| spring:
application:
name: StreamConsumerService
cloud:
stream:
binders:
defaultRabbit:
type: rabbit
environment:
spring:
rabbitmq:
host: 192.168.56.101
port: 5672
username: root
password: root
virtual-host: /
bindings:
input:
destination: default_stream
default-binder: defaultRabbit
|
这边绑定同一个交换机
2.3 消费者
1
2
3
4
5
6
7
8
9
10
11
12
13
14
15
16
17
18
19
20
21
22
23
24
25
26
27
28
29
30
31
32
| package com.example.consumer;
import com.rabbitmq.client.Channel;
import org.springframework.amqp.support.AmqpHeaders;
import org.springframework.cloud.stream.annotation.EnableBinding;
import org.springframework.cloud.stream.annotation.StreamListener;
import org.springframework.cloud.stream.messaging.Sink;
import org.springframework.messaging.Message;
import org.springframework.messaging.MessageHeaders;
import java.io.IOException;
@SuppressWarnings("all")
@EnableBinding(Sink.class)
public class ConsumerClient {
@StreamListener(Sink.INPUT)
public void sink(Message<?> message) throws IOException {
MessageHeaders headers = message.getHeaders();
Channel channel = headers.get(AmqpHeaders.CHANNEL, Channel.class);
Long deliverTag = headers.get(AmqpHeaders.DELIVERY_TAG, Long.class);
System.out.println(message.getPayload());
channel.basicAck(deliverTag, false);
}
}
|
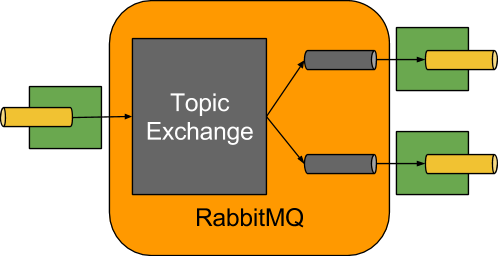
@EnableBinding(Sink.class)绑定通道,Sink是内置的一个简单输入通道,其实就是把我们的通道跟配置文件绑定一下,然后我们就可以发消息到配置的交换机
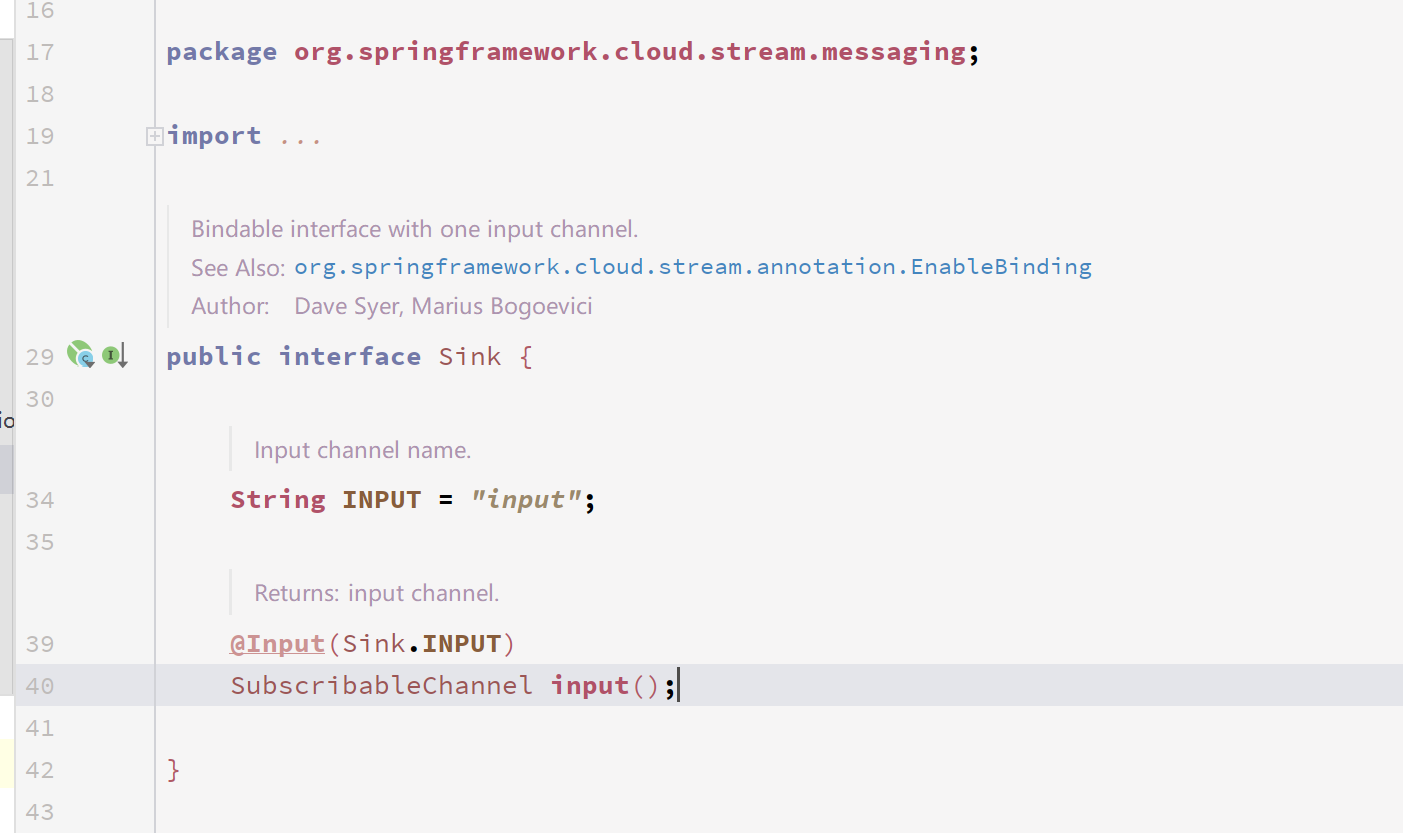
@Input注解就是把对应配置绑定到订阅通道,input字符串对应着配置文件,如果没指定注解的值,那么通道就是方法名,如果没有对应配置,就会创建一个以注解value值或方法名为名称的topic交换机。
@StreamListener(Sink.INPUT)这里就是监听对应的通道,获取消息
我们先启动消费者,让队列创建
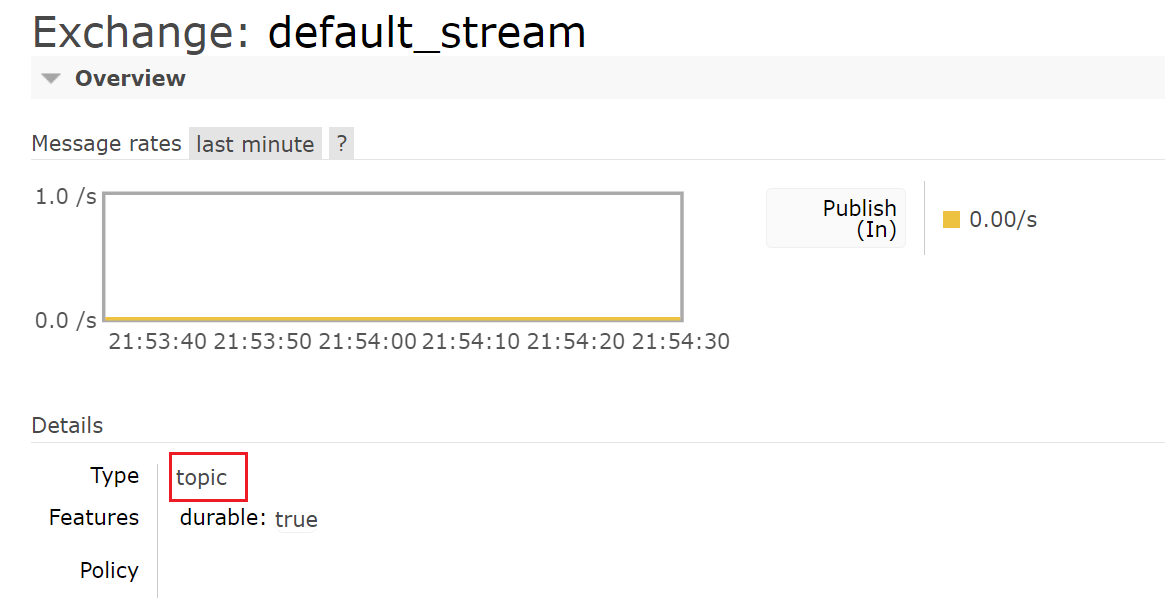
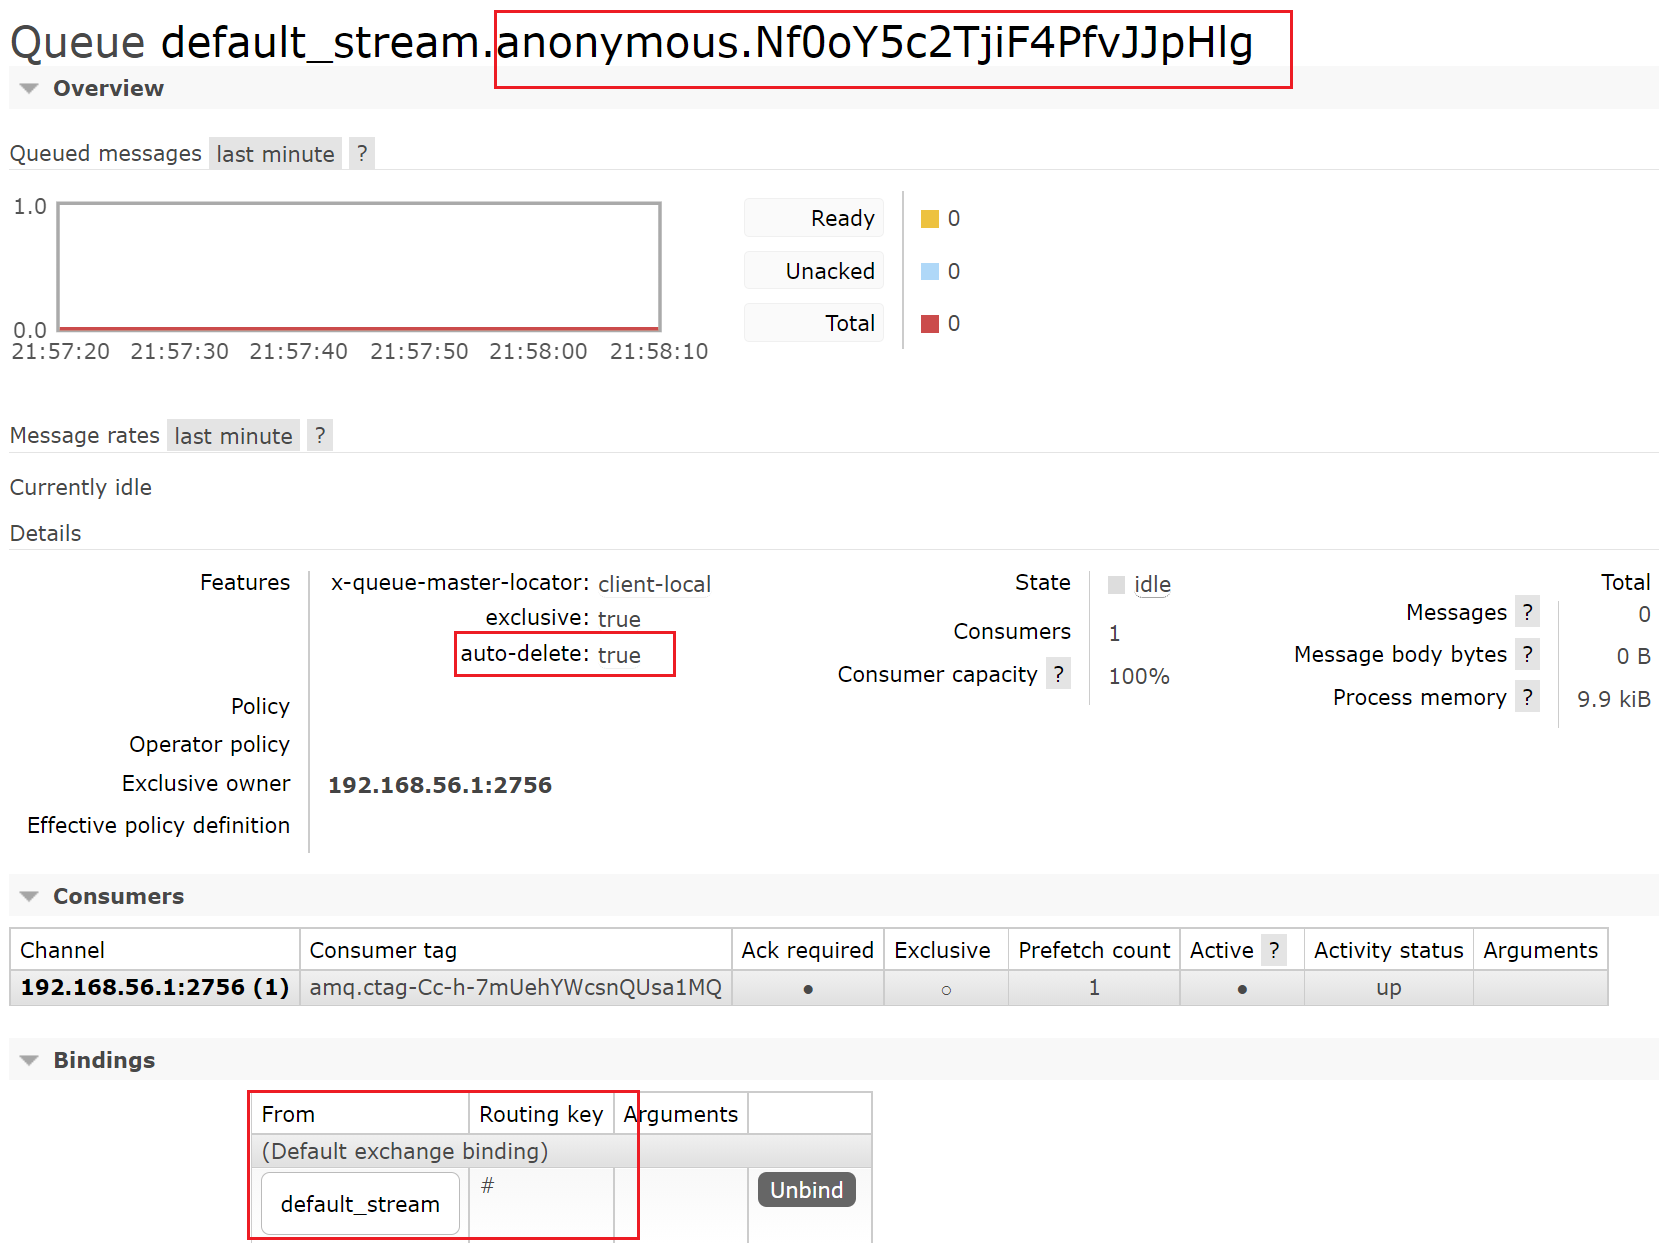
此时交换机和队列创建成功,我们可以发现交换机是topic类型的,队列名前面是交换机,后面有点奇怪。
队列是非持久化的,队列和交换机绑定,路由键是#,所以当我们消费者断开连接后队列会被删除,消息会丢失,后面会讲如何持久化队列
2.4 生产者
1
2
3
4
5
6
7
8
9
10
11
12
13
14
15
16
17
18
19
20
21
22
23
24
| package com.example.producer;
import org.springframework.beans.factory.annotation.Autowired;
import org.springframework.cloud.stream.annotation.EnableBinding;
import org.springframework.cloud.stream.messaging.Source;
import org.springframework.messaging.support.MessageBuilder;
@EnableBinding(Source.class)
public class MessageProducer {
@Autowired
private Source source;
public void send(String msg) {
for (int i = 0; i < 100; i++) {
source.output().send(MessageBuilder.withPayload(msg + i).build());
}
}
}
|
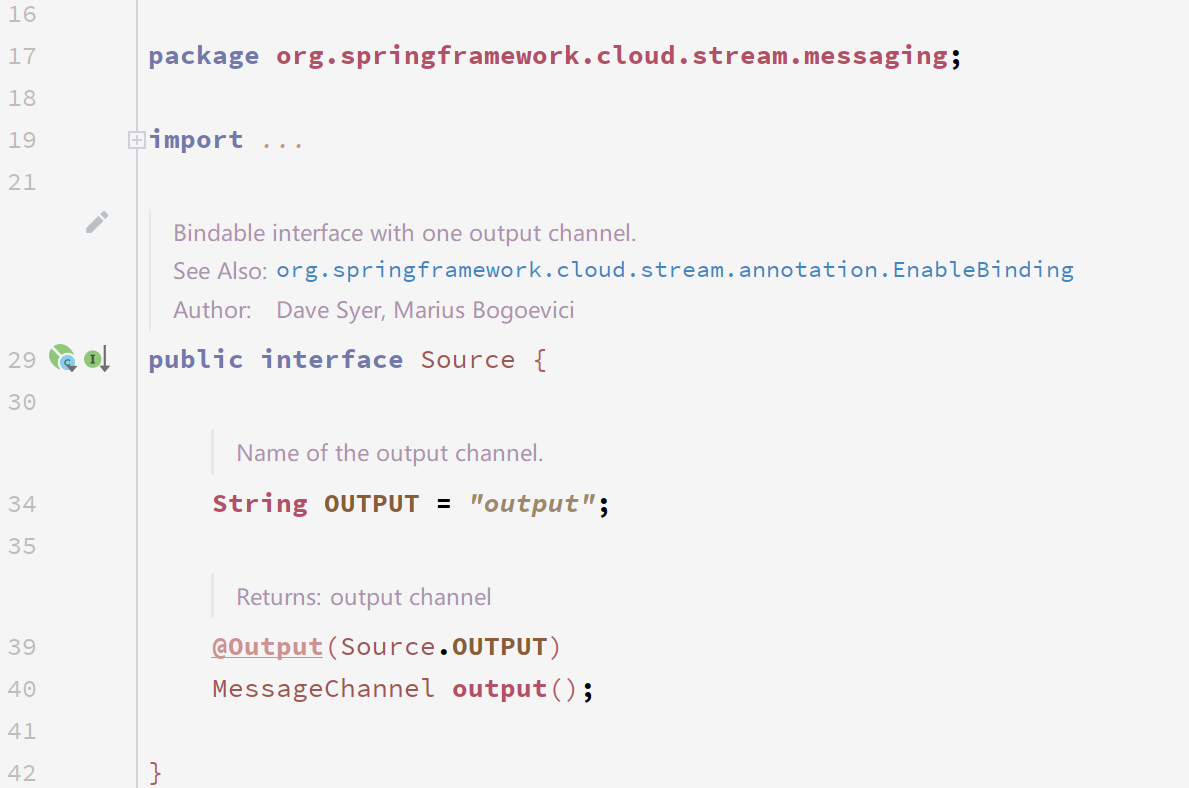
结构跟上面差不多,output跟配置文件对应。这边也需要去绑定通道,Source是内置输出通道,我们可以直接从ioc注入进来,直接调用他的output方法获取通道,然后使用MessageBuilder构造消息并发送
此时在测试类发送消息
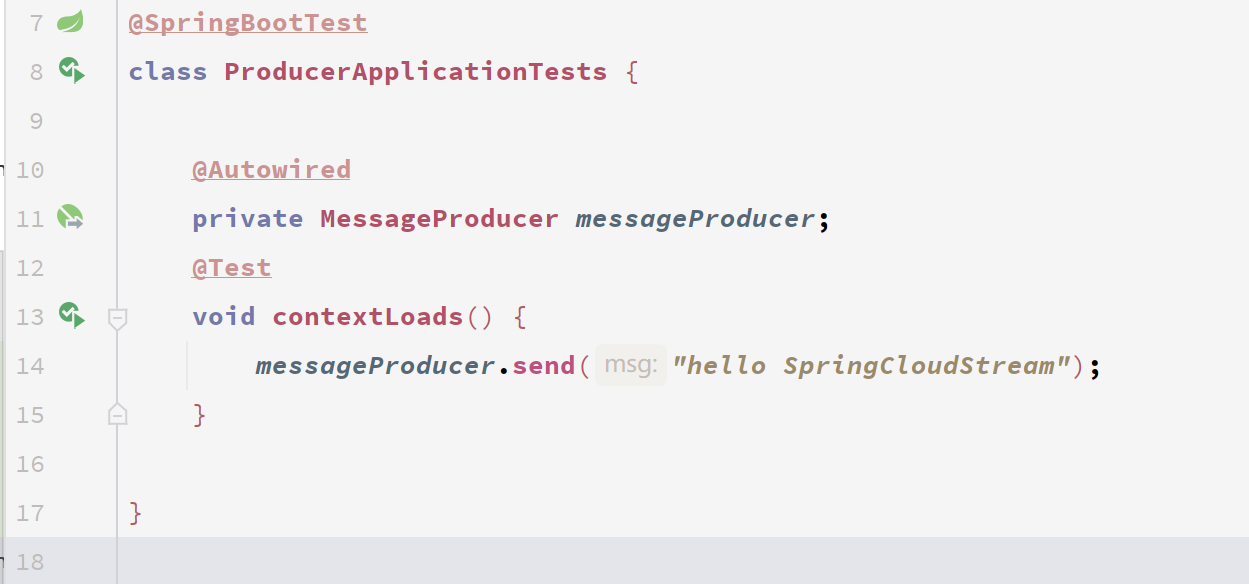
此时消息到达mq,并由交换机发送到对应队列
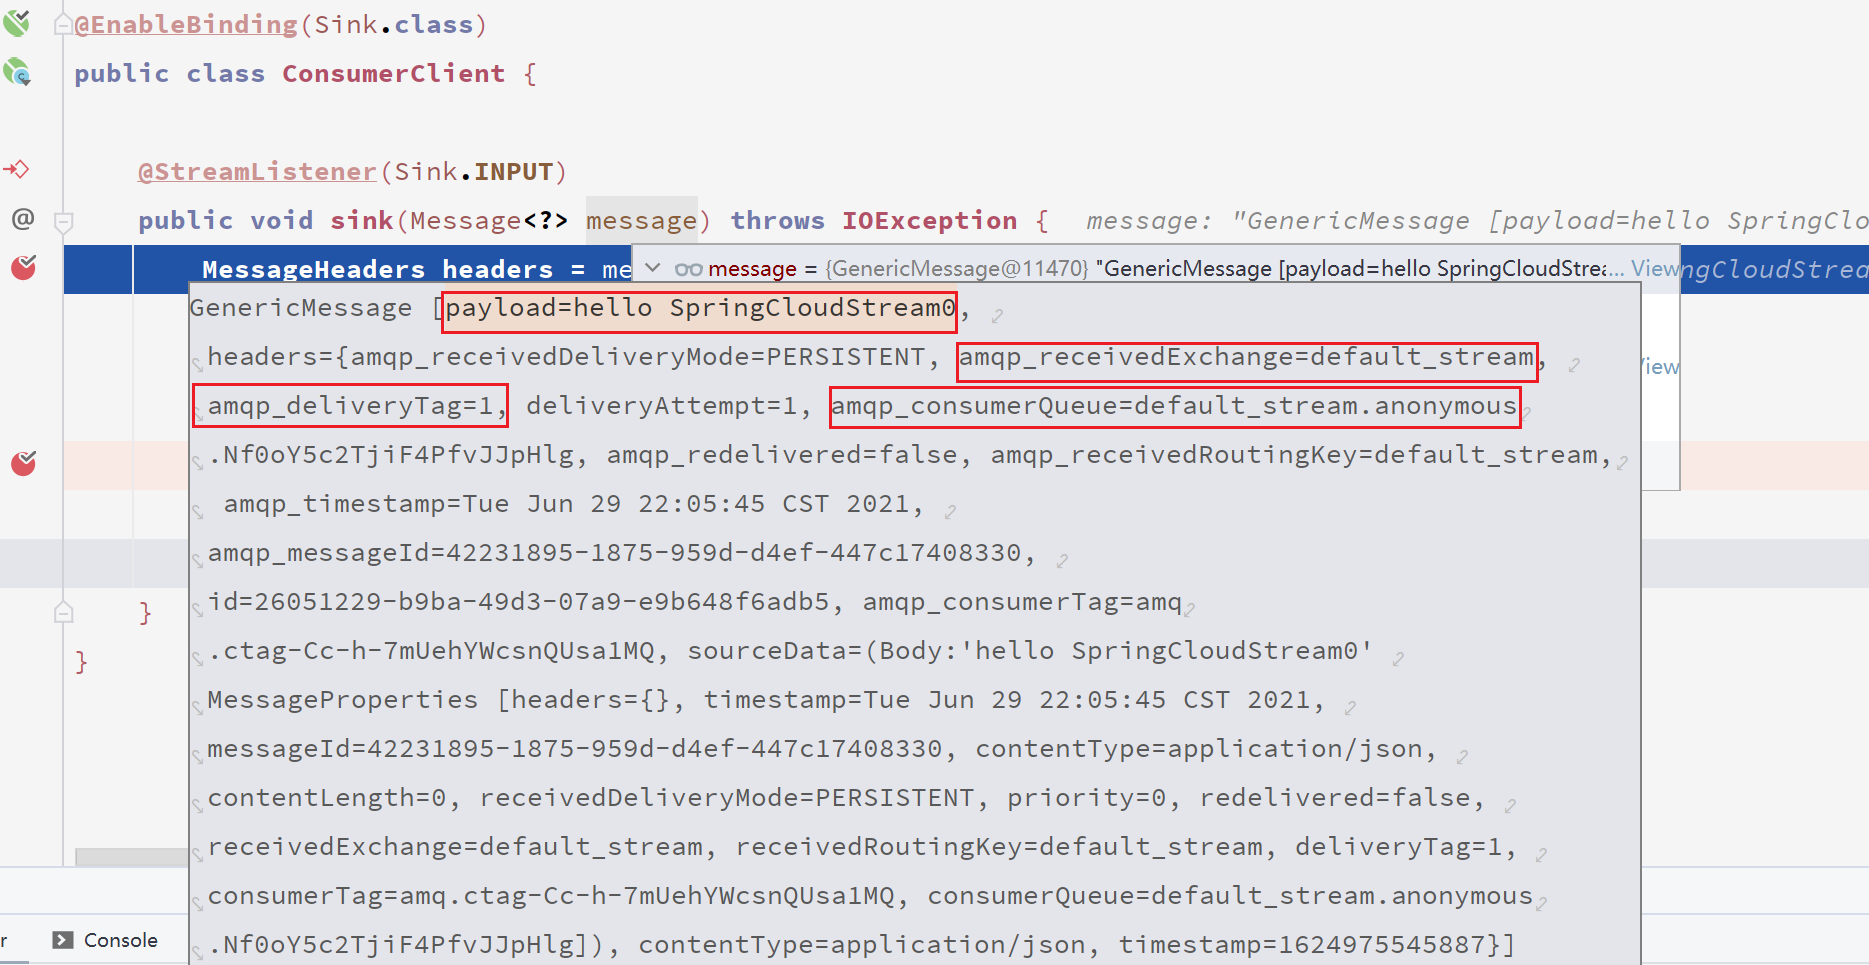
这边消费者接收到消息了,需要注意的是现在是自动ack,无法获取通道!
3. 消息分组
很多人可能对这个概念比较模糊,其实就是为了防止多个消费者拿到同样的消息,对消费者进行分组,创建不同队列。上面截图中可以看到队列名是一个随机的,当有多个消费者的时候,就会创建多个队列(随机名称)并绑定这个交换机,并且路由键都是#,意味着我们往mq发送消息时,两个消费者都会收到这个消息(可以自行测试)。下面配置下消息分组看看有什么不同
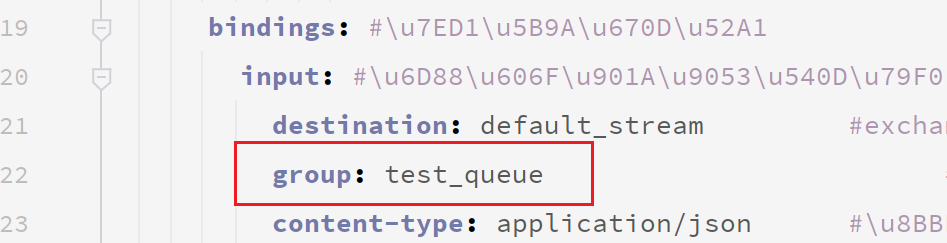
配置组名,启动消费者

会自动创建一个名为交换机.组名的队列,并且是持久化的,组名是不可重复的
4. Routing key
4.1 固定路由键
默认路由键是#,当我们需要对不同业务以路由键区分发出时我们就需要去绑定路由键了
消费者配置
1
2
3
4
5
6
7
8
9
10
11
| bindings:
input:
destination: default_stream
group: test_queue
content-type: application/json
default-binder: defaultRabbit
rabbit:
bindings:
input:
consumer:
binding-routing-key: test.routing
|
重新启动可以看到绑定上了
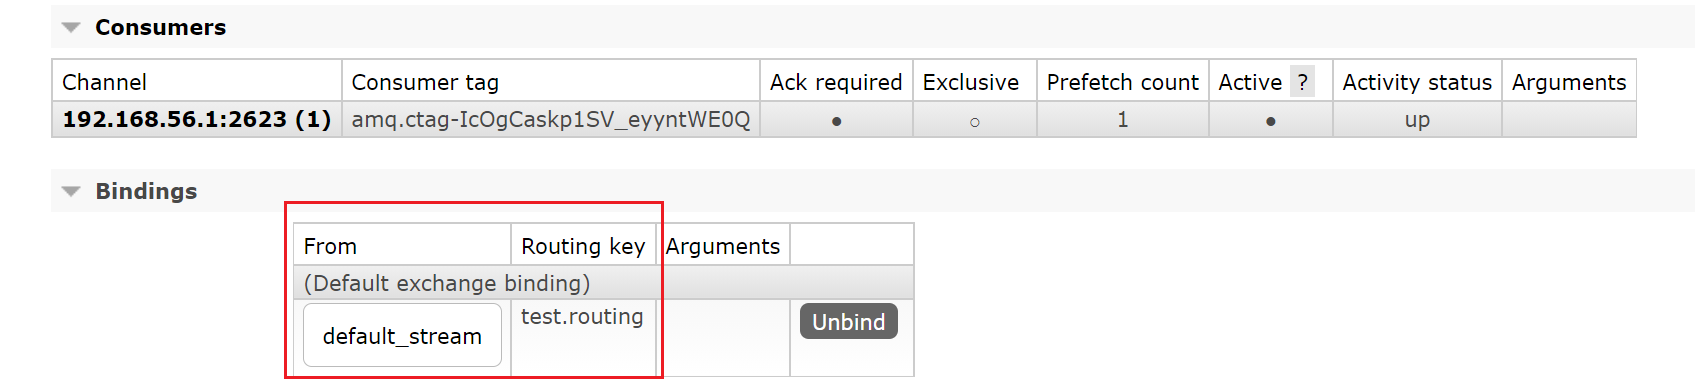
注意bingdings和rabbit是同级。如果重启后的队列有#这个路由键那是因为之前创建过了
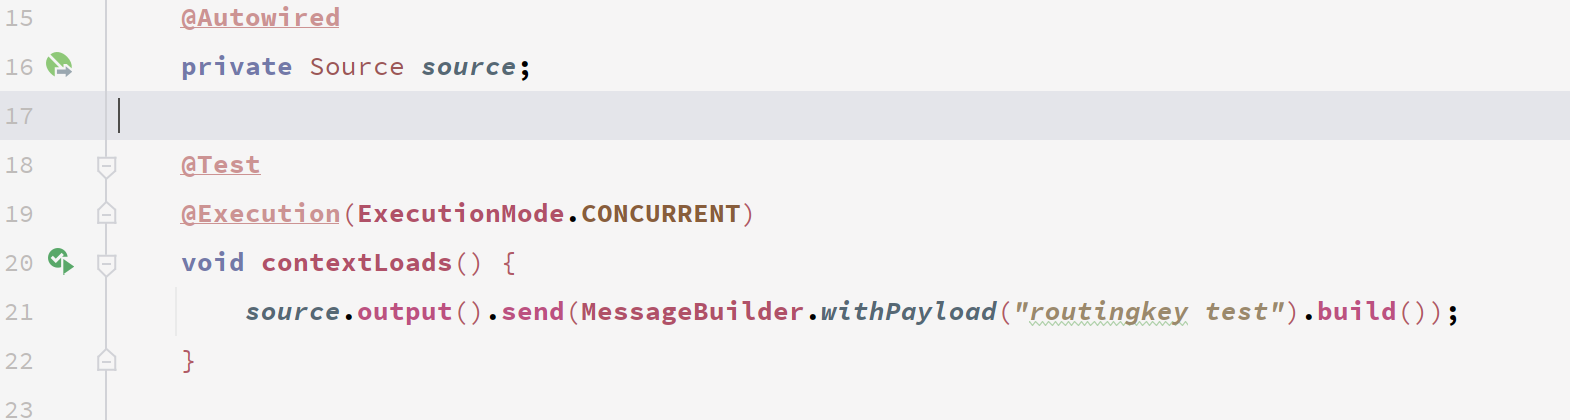
接下来配置生产者,并发送一条消息
1
2
3
4
5
6
7
8
9
10
| bindings:
output:
destination: default_stream
content-type: application/json
default-binder: defaultRabbit
rabbit:
bindings:
output:
producer:
routing-key-expression: '''test.routing'''
|
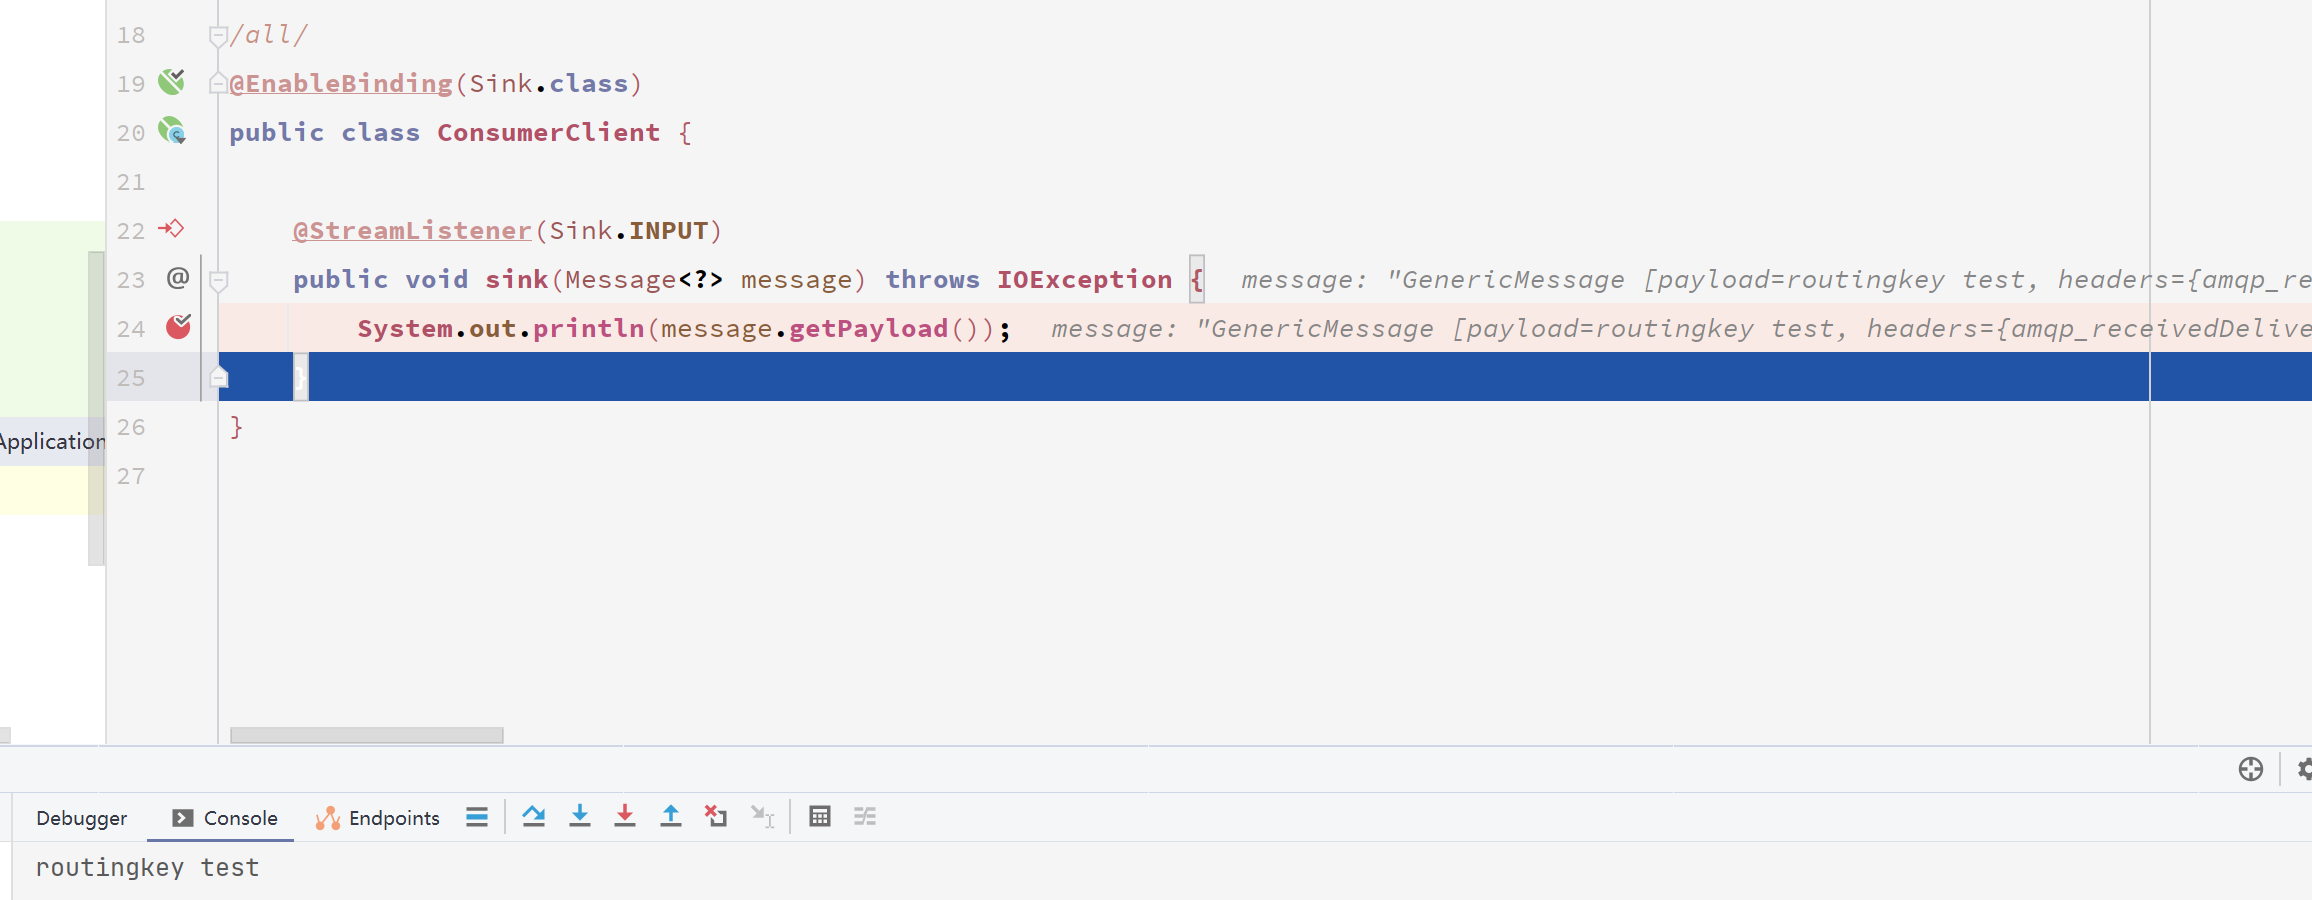
消费者这边马上就收到消息了
4.2 动态路由键
上面的路由键是我们写死的,其实我们情况下需要发送到不同的队列,这个时候就需要我们的动态路由了,在发mq时可以指定路由键
配置 routing-key-expression: headers['key']即可,意思就是从headers里面取key的值,这个key也可以换成别的键
8. binder Implementations